Home›Blog ›How to Correctly Clean the Optical Window of an Image Intensifier
How to Correctly Clean the Optical Window of an Image Intensifier
The entire cleaning process must strictly follow three core principles: gentle operation, scratch prevention, and corrosion prohibition, to avoid damaging the surface optical coating of the Optical Window of an Image Intensifier and degrading imaging clarity. Proper maintenance of this core component can extend the service life of your imaging device by 30% or more.
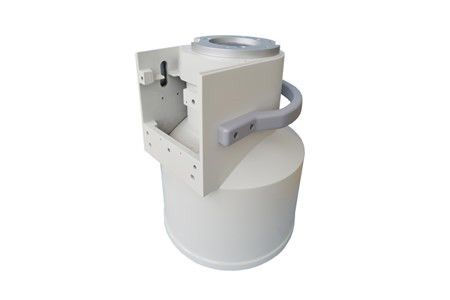
Pre-Cleaning Preparation
Perform all operations in a dust-free, dry environment, wearing anti-static gloves and a face mask to prevent human skin oils and saliva from contaminating the optical component.
Prepare dedicated tools: low-lint cleanroom wipes, medical-grade lint-free cotton swabs, rubber bulb air blower, and analytical-grade isopropyl alcohol. Never use ordinary paper towels or cotton cloths, as they will easily scratch the precision glass surface.
Power off the equipment in advance and confirm the complete shutdown of the whole unit, to eliminate safety risks from accidental contact with high-voltage components near the Optical Window of an Image Intensifier.
Step 1: Pre-Cleaning for Surface Dust
Hold the air blower 10-15 cm away from the window, blow off surface floating dust in a spiral path from the center outward at a 45° angle. This step removes 90% of loose particles that may scratch the glass in subsequent wiping steps.
Never blow the window vertically, to prevent hard particles carried by the airflow from scratching the optical coating.
For edges, grooves and other hard-to-reach areas that the air blower cannot cover, use a soft brush to sweep dust in one single direction.
Step 2: Stubborn Stain Removal
Fold the cleanroom wipe into 4 layers, dip it in a very small amount of isopropyl alcohol, and squeeze it to a semi-dry state to prevent excess liquid from seeping into the equipment interior through the window gap.
Wipe the glass gently and evenly in one single direction from the center outward. Replace the clean contact surface of the wipe every 2-3 wipes, to avoid re-depositing removed dirt back onto the component.
For local stubborn stains on the Optical Window of an Image Intensifier, use a lint-free cotton swab dipped in a tiny amount of isopropyl alcohol to dab the stain lightly. Do not rub back and forth repeatedly, which will cause permanent damage to the anti-reflection layer.
Step 3: Final Inspection
After cleaning, blow off residual trace liquid on the glass surface with clean nitrogen, or leave the unit to air dry naturally in a dust-free environment.
Inspect the window with a magnifying glass of 10x or higher magnification, to confirm no residual stains, fibers or new scratches are left.
Strictly Prohibited Operations
Never touch the glass directly with bare hands, as human skin oils will leave stubborn smudges that are extremely difficult to remove.
Never use alcohol, ether, chlorine-containing cleaners or alkaline solutions, as these reagents will corrode the anti-reflection coating on the window surface.
Never wipe with ordinary paper towels or rough cotton cloths, which will easily cause irreversible micro-scratches and permanently reduce imaging quality.
Never overuse cleaning liquid, to prevent liquid from seeping into the equipment through the gaps and damaging precision components such as the photocathode.
Author:Image Intensifier
Product Category
News
- How to Correctly Clean the Optical Window of an Image Intensifier
- NK-23XZ/P3H image intensifier can replace Thales original TH9438QX image intensifier
- High voltage power supply -NK5761HD/P4P7
- 9-Inch vs. 12-Inch Image Intensifier: Why Tube Size Alone Is the Wrong Way to Choose a Replacement
- Is Your C-Arm Image Intensifier Actually Failing? 6 Symptoms That Point to Replacement (and 3 That Don’t)
Contact us
Tel: +86 19015366638
Whatsapp: +86 19015366638
Email: newheekcn@163.com
Company: Weifang Newheek Electronic Technology Co., Ltd.
ADD: E Building of Future Star Scientific Innovation Industrial Zone of No.957 Wolong East Street, Yulong Community, Xincheng Sub-District Office, Weifang Hi-tech Zone, Shandong Province, China