Home›Blog ›Main considerations for image intensifier high voltage power supply replacement
Main considerations for image intensifier high voltage power supply replacement
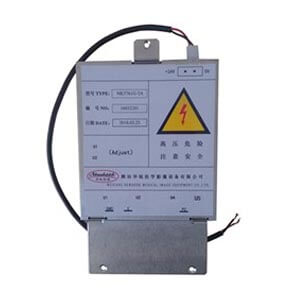
Everyone knows that the high-voltage power supply is the core component of the image intensifier. The high-voltage power supply can be used normally by the high-voltage power supply. Let’s take a look at the installation method of the high-voltage power supply and the precautions!
The following matters must be paid attention to before installation!
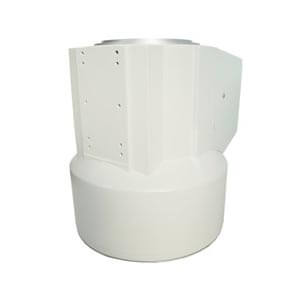
1. It must be ensured that the X-ray image intensifier tube works normally, and there is no tube discharge, leakage, air intake, and damage to the input screen.
2. It is best to use alcohol to clean the image intensifier high-voltage cable terminals and dry them in the air. If the terminals of the high-voltage cable are not clear, it may cause discharge after plugging in the high-voltage power supply, resulting in damage to the high-voltage power supply.
3. It must be ensured that the image intensifier high-voltage cable terminal is inserted into the high-voltage bottom to fix the high-voltage cable. Due to the loose high-voltage cable, it will cause sparks and cause damage to the high-voltage power supply.
4. Complete the above steps, but the high voltage of the high voltage power supply still has discharge phenomenon. It requires disconnecting the power, then pulling out the high voltage cable, applying some silicone rubber, and connecting it again. The discharge phenomenon will disappear.
5. It must be installed in a dry air environment.
Replacing method:
(1) Turn on the image intensifier, remove the connecting wire of the main power board, then replace the bad power board with a new main power board, and fix it according to the original installation method.
(2) Insert the high-voltage cable of the image intensifier into the high-voltage terminal of the high-voltage power supply. The high voltage cable must be plugged into the bottom!
(3) Insert the image intensifier G2 wire into the high voltage power supply G2 terminal.
(4) Connect the adjustment board PV to G1.
(5) Connect the photovoltaic ground terminal to the ground of the main power board.
(6) The ground wire that connects the image intensifier cathode electronics to the computer and the main power board grounding.
(7) Connect the DC24V power supply, the red wire is 24V, and the black wire is – 24V.

Author:Image Intensifier

Product Category
News
Contact us
Tel: (+86) 18953679166
Whatsapp: +86 18953679166
Email: service@newheek.com
Company: Weifang Newheek Electronic Technology Co., Ltd.
ADD: E Building of Future Star Scientific Innovation Industrial Zone of No.957 Wolong East Street, Yulong Community, Xincheng Sub-District Office, Weifang Hi-tech Zone, Shandong Province, China

